

A bare LED strip adhered between wood slats is a recipe for failure. It produces distracting hotspots and, without a proper heat sink, the LEDs will degrade and fail quickly. A professional, lasting result depends entirely on a purpose-built housing. A correctly specified LED channel for wood slat wall panels is not an accessory; it is the foundation. It manages heat to ensure longevity and shapes the light for visual uniformity. This guide focuses on the critical component choices and installation methods that separate a high-end architectural feature from a short-lived DIY mistake.
The Pursuit of Uniform Light
The goal is a solid, continuous band of light. Those distracting points of light you see in cheap installations? That is the sign of an amateur job, and it is entirely avoidable. This "dotting" or "hotspot" effect occurs when the individual LED chips are visible. The light simply does not have enough space or diffusion to merge into a uniform line.

COB Technology: The Direct Approach
For this kind of work, Chip on Board (COB) technology is the most effective tool. It is designed differently from the ground up. Instead of spaced-out chips, COB technology suspends the diodes in a continuous line of phosphor that glows as one solid bar of light.
Using COB strips is not about finding a shortcut; it is about using the right component to eliminate the primary cause of hotspots. This simplifies the project and ensures a clean, architectural result without complex component matching.

Achieving Uniformity with SMD Strips
It is still possible to get a good result with traditional Surface Mounted Device (SMD) strips, but it requires careful matching of the components. Success here hinges on the relationship between the density of the LEDs, the depth of the channel, and the diffusing quality of the cover. Think of it this way: the closer the LEDs are to each other, and the farther they are from the cover, the more their light will blend together.
This table outlines the typical component combinations needed to achieve a uniform appearance with a standard frosted diffuser.
LED Strip Type | LED Density (per meter) | Min. Channel Depth | Result |
|---|---|---|---|
SMD | 60 LEDs/m | 20mm | Faint spotting may be visible on close inspection. |
SMD | 120 LEDs/m | 12mm | Good uniformity, suitable for most finished walls. |
SMD | 240 LEDs/m | 7mm | Excellent uniformity, even in relatively shallow channels. |
COB | Continuous | Any Depth | Inherently uniform light in any compatible channel. |
Anatomy of the Lighting System
A successful installation is a balanced system. You are not just installing a light; you are assembling four distinct parts that must work together. A failure or poor choice in any one part will compromise the entire project's appearance and lifespan.
The Function of Aluminum Channels
The aluminum channel serves one purpose above all others: heat dissipation. An LED strip creates heat, and that heat is its worst enemy. Without a way to draw it away, the diodes will degrade, their color will shift, and they will fail prematurely. An LED channel for wood slat wall panels is the heat sink. It pulls that damaging energy away from the strip. Skipping a proper aluminum channel is not a cost-saving measure; it is a guarantee of future failure.
Beyond this, the channel provides physical protection from dust and impact, and a straight, rigid housing for a clean installation. In most slat wall projects, a matte black channel is used to match the dark acoustic felt, making the fixture itself disappear when the lights are off.
LED Strip Specifications
The strip itself is the light source. Its quality is determined by technical metrics like CRI (Color Rendering Index) for color accuracy, CCT (Correlated Color Temperature) for the warmth of the light, and its operating voltage (12V or 24V), which impacts system design. We will cover how to select these later.
Diffuser Properties and Light Quality
The diffuser, or cover, shapes the final look of the light. It presents a direct trade-off: diffusion versus brightness. The more it blends the light to hide the source, the less total light passes through. This measure is known as Visible Light Transmittance (VLT).
- Frosted/Opal: This is the workhorse for slat walls. It offers good diffusion to soften the light, with a VLT between 40% and 85%.
- Clear: Offers the highest VLT (>90%) but provides zero diffusion. It is unsuitable for this type of visible installation.
- Smoked/Black: This is a stylistic choice. It hides the fixture but can cut light output by 60% or more. Reserve this for low-level mood lighting where brightness is not a factor.
Power Supply and Voltage Considerations
The power supply, often called a driver, converts your home's AC power to the low-voltage DC the strip needs. An undersized or poor-quality driver is a safety risk and a common point of failure. It must match the strip's voltage and be rated to handle the total power draw.
Expert Advice: Sizing Your Power Supply
Overloading a power supply causes it to overheat and fail. To prevent this, your strip's total power consumption should never exceed 80% of the driver's maximum rating. This buffer is critical for reliability.
Calculation: (Total Strip Length in meters) × (Strip's Watts per meter) × 1.2 = Minimum Driver Wattage
Component Selection Framework
The final appearance and long-term reliability of your project are determined before a single tool is picked up. Making the right choices here is what separates a professional outcome from a call-back. This is not about buying the most expensive parts, but the most appropriate ones.
Channel Types for Slat Walls
The first decision dictates the final look and the difficulty of the installation. The type of LED channel for wood slat wall panels you select must align with your aesthetic goal and the realities of the installation environment. There are three primary types to consider, each designed for a different application.
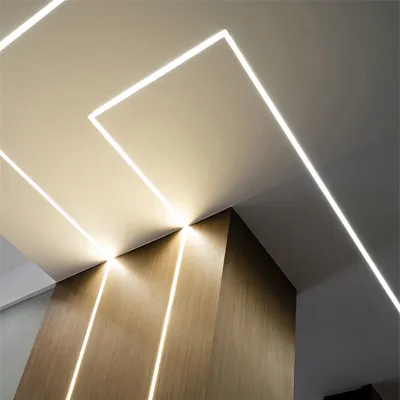
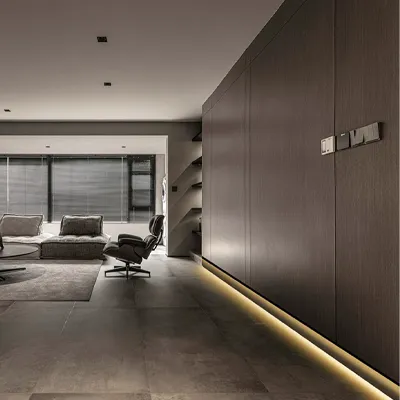
Recessed Channel Installation
This is the method for achieving a truly integrated look. The channel is designed to fit precisely into the gap between two wood slats, mounted directly onto the felt backing. When done correctly, the fixture itself becomes invisible, leaving only a clean line of light that appears to be part of the wall's structure. This approach demands precision, as the channel's width must match the slat gap exactly, but the result is unmatched for a high-end, architectural finish.
Surface-Mounted Channel Installation
For a more forgiving and rapid installation, surface-mounted channels are the answer. These profiles are mounted directly onto the face of the slats or, more commonly, onto the felt backing between them using clips or screws. The primary trade-off is aesthetics. A surface-mounted channel protrudes from the wall and can appear bulkier, but it is a practical choice for DIY projects or situations where slat spacing may not be perfectly uniform.
Edge and Finishing Channels
This is a specialized, finishing-oriented profile used to provide a clean termination for the entire slat wall. Instead of sitting between slats, it is installed on the vertical or horizontal boundary of the installation. Its L-shaped design allows it to frame the feature wall, directing light either across the wood's edge for a sharp highlight or away from the wall for a soft, ambient glow.
Choosing an LED Strip
The channel is the body, but the LED strip is the soul of the system. The technical specifications of the strip you choose will define the quality of the light itself.
The Case for High CRI Illumination
Color Rendering Index (CRI) is arguably the most critical specification for lighting natural materials like wood. It measures, on a scale to 100, how accurately a light source reveals the true colors of an object. A low CRI light (below 80) will make even the most expensive, beautifully grained wood appear flat and lifeless. For any high-quality slat wall installation, a CRI of 90 or higher is not a luxury; it is a requirement to ensure your investment in the wood is properly showcased.

Color Temperature for Wood Surfaces
Correlated Color Temperature (CCT), measured in Kelvin (K), defines the color appearance of the light. For wood, this choice is fundamental to the mood of the space. A warm white light in the 2700K to 3000K range is overwhelmingly recommended. Its warm hue is similar to old incandescent bulbs and enhances the natural richness of wood grain. Cooler, more neutral light (4000K+) tends to feel sterile and clashes with the inherent warmth of the material.

24V Versus 12V Systems
The choice between 12V and 24V systems comes down to performance over distance. An issue known as "voltage drop" causes LED strips to grow dimmer at the far end of a long run. By operating at a higher voltage, a 24V system can power longer continuous runs with more consistent brightness. For any run longer than 5 meters (16 feet), or for any project where performance is a priority, a 24V system is the more robust and professional choice.
Field Guide: 12V vs. 24V Systems
Factor 12V System 24V System The Verdict Max Practical Run ~5 meters 10+ meters For full walls, 24V is superior. Brightness Consistency Prone to dimming Stays consistent 24V provides a more professional result. Complexity Requires more wiring on long runs Simpler wiring for long runs 24V is less work for a better outcome. Verdict For small accent pieces only. The standard for any serious slat wall project.
Diffuser Trade-Offs
The plastic cover, or diffuser, is a final balancing act. You are always trading diffusion for brightness.
Balancing Transmittance and Diffusion
There is an unavoidable, inverse relationship here: the more effectively a diffuser blends light to hide the LED dots, the more light it blocks. An opaque, "milky" diffuser may provide a beautifully uniform line of light, but it can also reduce the final brightness by 50% or more. This light loss must be anticipated. If a certain brightness level is needed, you must start with a more powerful LED strip to compensate.
The Purpose of Black Diffusers
A smoked black diffuser is a purely stylistic component. It is designed to pair with a black channel to create an almost invisible fixture when the light is off. This sleek look comes at a severe cost in brightness, often blocking 60% or more of the light. This option should only be considered for decorative accents where mood is the primary objective and brightness is not a factor.
Post-Installation Troubleshooting
Even with careful work, issues can arise. A systematic approach to diagnosis can save hours of frustration. Most problems stem from a few common causes related to connections or power.
Diagnosing and Fixing Flickering
Flickering is almost always a sign of an unstable connection or an incompatible component. Before assuming a part is faulty, check the entire chain. A loose pin in a connector, a wire not fully seated in a terminal, or an old dimmer switch not designed for LEDs are the most frequent culprits.
Addressing Voltage Drop and Dimming
If the strip is bright at the start but gets noticeably dimmer at the far end, you are seeing voltage drop in action. This occurs when a wire run is too long for the system's voltage and wire gauge. The only true fixes are to re-engineer the run by splitting it into shorter parallel segments, or to use a system with a higher voltage (24V) from the outset, which is designed to handle longer distances.
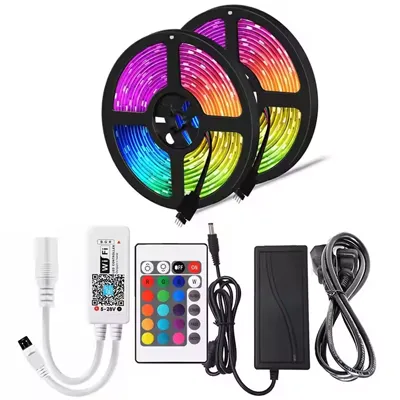
Correcting Color Issues on RGB Strips
When an RGB strip shows the wrong colors or one color is missing entirely, the problem is almost certainly at a 4-pin or 5-pin connection point. Often, the connector is simply plugged in backward; flipping it 180 degrees can solve the issue. If that fails, a poor connection on one of the individual color channels (Red, Green, or Blue) is the likely cause. Reseating or replacing the connector is the next step.
Identifying and Solving Power Failures
If an entire strip fails to turn on, start with the simplest check: is the outlet working? If so, the issue lies with the power supply or the initial connection to the strip. A multimeter can be used to test the output of the power supply. If there is no voltage, the driver has failed. If there is voltage, the fault lies in the connection between the driver and the strip.
Troubleshooting Field Guide
Issue Probable Cause(s) Solution(s) Flickering Light 1. Loose wire connection.
2. Incompatible dimmer switch.1. Check and secure all connections at the strip, controller, and driver.
2. Test by removing the dimmer from the circuit.Dimming at End of Strip Run is too long for the voltage (Voltage Drop). 1. Use a 24V system for longer runs.
2. Power the strip from both ends or in parallel segments.Incorrect RGB Colors 1. Connector is reversed.
2. Poor pin contact on one color channel.1. Flip the 4/5-pin connector 180 degrees.
2. Reseat or replace the solderless connector.Entire Strip is Off 1. No power from outlet.
2. Faulty power supply.1. Check outlet and circuit breaker.
2. Test driver output with a multimeter; replace if no voltage.
Advanced Lighting Techniques
With the fundamentals in place, you can move beyond simple illumination and use light as a design tool to shape the space and mood.
Grazing Light to Accentuate Wood Texture
This technique uses light to reveal and enhance surface texture. By placing the LED channel at the very edge of the slat gap and directing the light almost parallel to the adjacent slat's surface, you create sharp highlights and deep shadows. This makes the wood grain "pop" and emphasizes the three-dimensional quality of the wall in a dramatic fashion.
Backlighting for a Floating Wall Effect
Instead of directing light out into the room, a more sophisticated technique is to mount the LED strips behind the slat panels, facing the wall they are mounted on. This creates a soft, indirect glow that emanates from behind the entire installation. This backlighting technique makes the entire slat wall appear to float in front of the structural wall, creating a sense of depth and eliminating any potential for uncomfortable glare.

Smart Controls and Home Automation Integration
Modern lighting is interactive. The ability to dim the lights is a standard expectation. More advanced systems offer tunable white CCT control, allowing you to shift the mood from a cozy 2700K to a productive 4000K. Full integration with smart home ecosystems like Google Home or Amazon Alexa allows for voice control, scheduling, and the creation of complex lighting "scenes" that are part of your broader home automation.
Project Planning and Safety
These are the non-negotiable considerations that ensure a project is not only beautiful but also safe, reliable, and serviceable for years to come.
Designing for Future Serviceability
This is the mark of a true professional. Before the wall is finished, ask yourself: "How will I replace the power supply when it fails in five years?" Power supplies must remain accessible for maintenance or replacement. They should never be permanently sealed inside a wall cavity without an access panel. They also generate heat and require ventilation, so placing them in a nearby closet or a well-ventilated cabinet is a far better choice than burying them behind drywall.
Long-Term Maintenance Expectations
While LED systems are low-maintenance, they are not zero-maintenance. The channel diffusers will accumulate dust over time and will need to be wiped clean to maintain their appearance and light quality. The long lifespan of the LEDs themselves is entirely dependent on the quality of the initial installation, specifically the thermal management provided by the aluminum channel.
Guidelines for Professional Consultation
While many aspects of these projects are DIY-friendly, electrical work has clear boundaries. If your project requires running new 120V/240V household wiring, if a circuit breaker is tripping, or if you are in any way unfamiliar or uncomfortable with electrical practices, it is time to hire a licensed electrician. Their expertise ensures the installation is safe, reliable, and compliant with local electrical codes.
Frequently Asked Questions
Can I cut the aluminum channels to a custom length?
Yes, aluminum channels can be cut. For the cleanest result, use a miter saw with a fine-toothed blade designed for non-ferrous metals. A simple hacksaw will also work but may require filing the edge smooth afterward to remove burrs.
What should I do if my LED strip is too wide for the channel?
An LED strip that is too wide for the channel's internal dimensions must not be forced in. This prevents proper heat transfer and can damage the strip. The only correct solution is to acquire a channel with appropriate internal width or a narrower LED strip that fits correctly.
Is it possible to paint the channels and diffusers?
Painting channels is generally not recommended as it can reduce their ability to dissipate heat. If necessary, use a very thin coat of high-heat spray paint. Painting the diffuser is not advised as it will block light unevenly and ruin the diffusion quality.
How do you run wires around a corner with a slat wall?
For corners, the most common method is to terminate the channel at the corner, drill a small hole through the felt backing, and pass the wire through to the next wall. A new channel section is then started on the adjacent wall, connected to the same wire run.
Do I need a special tool to cut the plastic diffuser cover?
A special tool is not required, but care is needed. For the cleanest edge on a plastic diffuser, use a fine-toothed hand saw or score it deeply with a utility knife and snap it cleanly. Cutting slowly is key to prevent the material from cracking or chipping.