


Remote not working for your LED light strips? Learn how to connect, pair, and troubleshoot common issues like wrong colors or TV remote interference in our expert guide.
You have your new LED light strips ready, anticipating a vibrant display of color. You press a button on the remote, and nothing happens. Or worse, the wrong color appears. This common experience is where the excitement of a new project can turn into a genuine headache. This guide exists for that exact moment. We will cover how to use your LED light strips with a remote, but more importantly, we provide the professional solutions for when things inevitably go wrong.
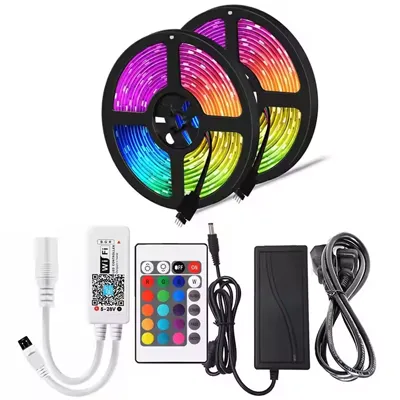
Your System's Four Core Components
To get the results you want, you must first understand that you are not just working with a strip of lights. You are working with a system of four interconnected parts. The performance and reliability of this entire system are only as strong as its weakest link.

What am I actually working with?
Here are the four core components that came in your kit.
- The LED Strip: The light source itself. A flexible circuit board holding the light-emitting diodes (SMD chips).
- The Controller/Receiver: The brain of the operation. It receives the signal from your remote and tells the lights what to do.
- The Power Supply: The heart of the system. It converts your home's high-voltage AC power into the low-voltage DC power the strip needs.
- The Remote Control: Your direct interface to control the lighting environment.
Part 1: First Use & Mastering Your Remote
This section covers the essential steps to get your lights running correctly from the start. A few moments spent here will prevent the most common setup headaches.
How do I connect and pair my remote for the first time?
Before plugging anything in, locate your remote. Most new remotes have a small, clear plastic tab in the battery compartment. You must pull this tab out to activate the battery. This is the single most common reason a new remote appears to be non-functional.
Once the tab is removed, follow this connection order:
- Plug the Power Supply into a working wall outlet.
- Connect the Power Supply to the Controller/Receiver.
- Connect the Controller/Receiver to the LED Strip. Pay close attention to the alignment here. Most connectors have small arrows on them that must line up. If they are not aligned, the lights will not work.
If the lights turn on but do not respond to the remote, you likely need to pair them. This "Power Cycle Reset" is a time-sensitive method that works for the vast majority of systems.
- Unplug the power supply from the wall. Wait 10 seconds.
- Have your remote in hand and ready.
- Plug the power supply back in.
- Immediately (within the first 5 seconds), press and hold a button on the remote. The most common buttons to try are ON/OFF or SPEED+.
- Keep holding the button until the LED strip flashes several times. This flash confirms the remote is successfully paired.
What do all these buttons mean?
An LED remote can seem intimidating, but its functions are straightforward once you understand the standard layout. The table below explains the most common buttons and offers tips for using them creatively.

Button / Icon | Standard Use | Pro Tip / Creative Use |
|---|---|---|
ON / OFF | Turns the lights on and off. | The key button to press and hold during the "Power Cycle Reset" to pair an unresponsive remote. |
Brightness +/- | Increases or decreases the light's intensity. | Use it to perfectly balance your accent lighting against other lights or fine-tune custom colors in DIY mode. |
Static Colors (R,G,B,W etc.) | Instantly selects a single, fixed color. | A great diagnostic tool. If you press Red and the light is not red, it points to a bad pin connection, not a broken strip. |
JUMP 3 / JUMP 7 | Instantly switches between 3 or 7 preset colors. | Creates a high-energy, dynamic effect for parties or can cycle through team colors for themed decor. |
FADE 3 / FADE 7 | Smoothly transitions between 3 or 7 preset colors. | Set to a slow speed for a calming, "chromotherapy" ambiance, perfect for relaxation or a gentle night light. |
DIY 1-6 | Saves and recalls up to six custom-made colors. | Your most powerful feature. Use the colored arrow keys to mix your perfect shade, then press the DIY button again to save it. |
QUICK / SLOW | Adjusts the speed of the JUMP and FADE modes. | A powerful mood-altering tool. A fast fade creates excitement, while a very slow fade can subtly shift a room's atmosphere over time. |
Part 2: The Troubleshooting Playbook (Why It's Not Working)
This is the section you are likely here for. When the lights do not respond or behave erratically, working through a logical process will solve the vast majority of issues. These problems are rarely a sign of a completely broken product, but rather a simple issue that needs correction.
Problem 1: My remote is completely unresponsive.
You are pressing buttons, but nothing is happening. The lights are either stuck on one color or will not turn on at all. Follow this troubleshooting flow from simplest to most complex.
- Check the Battery Tab: As mentioned earlier, ensure the plastic isolation tab has been removed from the battery compartment.
- Check the Battery: Replace the battery with a fresh one. Make certain it is inserted with the correct polarity (+ side facing up). This is the most common fix.
- Perform the Phone Camera IR Test: This is a professional trick to determine if your remote is transmitting a signal at all. Open the camera app on your smartphone and point the remote's emitter at the lens. Press any button. If you see a faint, flashing purple or white light on your phone's screen, the remote is working correctly. If you see nothing, the remote itself is faulty.
- Check the Receiver: If the remote is transmitting a signal, the issue lies with the receiver. Check the small black bulb on the controller. Is it blocked by furniture or covered in dust? Clean it and ensure a clear line of sight to your remote.
- Re-Pair the Remote: The connection may have been lost. Perform the "Power Cycle Reset" detailed in Part 1. This re-establishes the unique link between the remote and the controller and is the most likely solution if the camera test passes but the lights still do not respond.

Problem 2: The colors are wrong! (e.g., I press red, it turns green)
This is one of the most confusing issues for new users. You press the red button on your remote, but the lights turn green. You press green, and they turn blue. The color mapping is completely scrambled.
The cause of this is almost never a "broken" LED strip or remote. This issue is overwhelmingly caused by a poor or incorrect connection in the 4-pin connector that links the strip to the controller or joins two strips together. The 4-pin system has one pin for each color (Red, Green, Blue) and one for power. If just one of those color pins is not making solid contact, that color signal is lost, and the output becomes scrambled.
To fix this, unplug the power supply first. Then, find the 4-pin connector and disconnect it. Check for any bent pins, straighten them carefully, and reconnect it firmly. Ensure the alignment arrows on both sides of the connector are matched perfectly. For a permanent, professional-grade solution, soldering the wires is far more reliable than using the cheap, solderless clamp connectors common in budget kits.

Problem 3: My TV remote is controlling my lights!
You change the TV volume, and your lights flash. You turn off your soundbar, and the LED color changes. This maddening issue is not a defect; it is a technology limitation.
The cause is Infrared (IR) signal interference. Your LED kit uses a simple IR controller that shares the same infrared frequencies as your other household remotes. When you use your TV remote, the LED controller "thinks" it is receiving a command and reacts.
Here are three ways to solve this problem, from simple to permanent.
- The Low-Tech Block: The easiest immediate fix is to physically hide the LED strip's IR receiver. Tuck it behind the TV, inside a cabinet, or anywhere your TV remote's signal cannot easily reach it.
- The DIY Shield: For a more targeted solution, you can narrow the receiver's "field of view." Create a small, hollow tube out of black electrical tape or dark paper and fit it snugly over the IR receiver bulb. This forces you to point the LED remote directly into the tube to control the lights while blocking stray signals from other remotes.
- The Permanent Upgrade: The best long-term solution is to eliminate IR technology entirely. Upgrading to a system that uses an RF (Radio Frequency) or Wi-Fi controller will permanently solve the interference problem, as these technologies do not require a line of sight and operate on dedicated frequencies.
Feature | IR (Infrared) Remote | RF (Radio Frequency) Remote |
|---|---|---|
How it Works | Uses pulses of light | Uses radio waves |
Line of Sight | Required (must point at it) | Not Required (works through walls) |
Interference | High. Prone to interference from TV and other remotes. | Low. Paired to its specific receiver, immune to TV remotes. |
Best For | Budget projects with a clear line of sight. | The superior choice for reliability and hidden installations. |
Part 3: The Upgrade Path (Beyond the Basic Remote)
If you find yourself constantly battling interference or simply wishing for more creative control, there are better options available than the standard remote that came with your kit. This is where you can move beyond the common frustrations by upgrading a key component of your system.
How can I control my lights without the remote?
The most direct upgrade is to replace the small black controller box with a smart controller. These modern units use Wi-Fi or Bluetooth to connect directly to an app on your smartphone. This means you will never have to search for a lost remote again, and interference from your TV remote becomes a problem of the past.
What can I do with a smart app?
Using your phone to control your lights opens up possibilities that a physical remote cannot offer. You can pinpoint millions of colors from a wheel on your screen instead of being limited to a few preset buttons. Many apps can also use your phone's microphone to make the lights flash and change color in time with your music. You can even set schedules, like having the lights slowly turn on to wake you up in the morning, or integrate them with Amazon Alexa or Google Home for voice control.
When should I consider a professional-grade system?
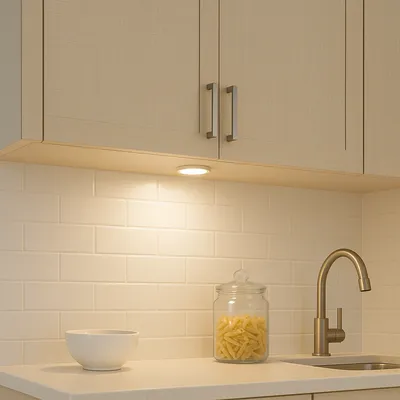
A smart controller improves how you interact with your lights, but the quality of the light itself comes from the strip. If you look at your installation, especially in a visible area like under a kitchen cabinet, and see distracting dots of light instead of a smooth, solid line, then it is time to consider better hardware.
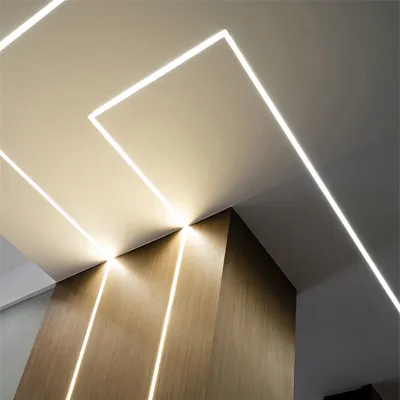
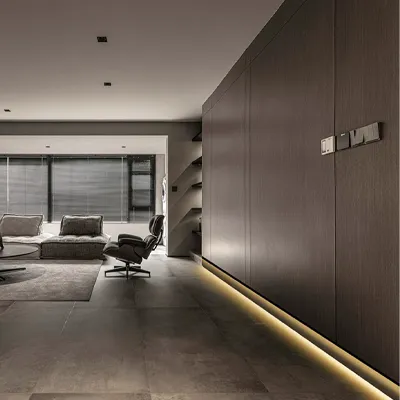
You can solve this by mounting your LED strip inside one of our aluminum LED Profile channels. The metal channel helps with heat, and its frosted cover diffuses the light, blending the individual spots into a seamless glow.
This is the core difference of a professional system. The common issues of bad remotes, color glitches, and interference almost always trace back to budget kits with mismatched parts. Our LED Strips & Power Supplies kits are engineered so that every component works together perfectly, offering a reliable foundation that avoids these problems from the very start.
Conclusion
You now have the knowledge to use your LED strip remote and, more importantly, to diagnose and solve the most common issues like an expert. You understand that when a remote fails, the problem often lies in the battery, the connection, or the signal. You can now work through these issues logically instead of with frustration.
If you decide the limitations of a basic kit are holding you back, you also know the path forward. An upgrade to a smart controller can unlock new features and convenience, while investing in a quality lighting system with the right strips and profiles will give you a beautiful, reliable result that lasts for years.
Frequently Asked Questions
How do I reset my LED light remote?
A common way to reset the remote itself is to remove the battery, press and hold any button for 15 seconds to discharge residual power, and then reinsert the battery. If you are trying to reset the connection to the lights, you should perform the "Power Cycle Reset" pairing method detailed in Part 1 of this guide.
Can I use one remote for multiple LED strips?
Yes, but it depends on the technology. With IR remotes, one remote can control any number of strips as long as their receivers are in the same line of sight. With RF remotes, you can typically pair one remote to multiple receivers from the same brand, even if they are in different rooms.
Why do my LED lights turn on by themselves?
This is often caused by stray electrical signals or a faulty power supply. Interference from other household electronics can sometimes trigger the controller. It can also happen if the power supply is unstable and temporarily shuts down and restarts, causing the lights to turn on.
How do I use the DIY function on my remote?
First, press the DIY button you wish to program (e.g., DIY1). Next, use the colored up and down arrow keys to add or remove red, green, and blue light until you create your desired shade. When you are satisfied, press the same DIY button again to save the color.