

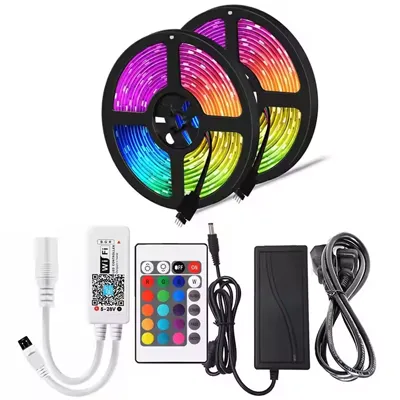


LED strip lights are a fantastic tool for creative lighting, but a dangling power cord and a bulky wall adapter can often ruin a clean, minimalist design. Whether you're trying to achieve a seamless look for your kitchen cabinets, install lighting in a car, or create a portable art project, the question is always the same: how do you power LED strips without a plug? The good news is, you have plenty of options. A traditional wall outlet is far from the only way to get your lights shining.
This comprehensive guide will walk you through eight different methods for powering your LED strips, from the simplest battery solutions to professional hardwiring techniques. We'll explore the pros and cons of each, helping you find the perfect solution for your specific needs.
8 Creative Ways to Power LED Strips
Let's dive into the practical methods you can use to achieve a clean, plug-free installation. We'll start with the simplest and move toward the more advanced solutions.
1. Powering from a USB Port
This is arguably the easiest and most accessible method for shorter, low-power LED strips without a plug. Many modern devices, such as TVs, desktop computers, and even gaming consoles, have built-in USB ports that can supply the 5V DC power needed for compatible LED strips. This is a perfect solution for creating a monitor backlight or adding accent lighting to a media center, as the power source is already conveniently located and hidden. Just remember, this method is almost exclusively for 5V strips, so always check your strip's voltage requirement first.
2. Using a Portable Power Bank
Think of a power bank as a high-capacity, rechargeable battery pack with a convenient USB output. If a standard USB port doesn't provide enough amperage for a longer or brighter strip, a power bank is the next logical step. It’s an ideal solution for temporary or portable setups, like lighting for an event, a trade show booth, or even a camping trip. A high-capacity power bank can run a sizeable LED strip for many hours, giving you ultimate freedom from wall outlets.
3. Running on Standard Batteries
For smaller, more contained projects, a dedicated battery pack is an excellent choice. These typically use common AA or AAA batteries housed in a small plastic case with an integrated on/off switch. This is the go-to answer for what kind of battery for led strip projects like costumes, scale models, or lighting inside a small closet or drawer where running wires would be impossible. While not suitable for long-term or high-power use, its simplicity and low cost are unmatched for these specific applications.
4. Hiding the Power Adapter
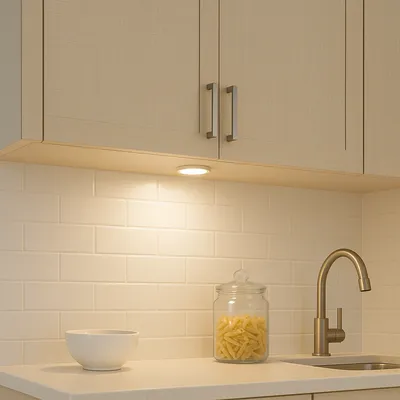
This is a clever and highly practical "trick" that achieves the look of a plug-free installation. The method involves using the standard power adapter that comes with your LED kit, but strategically hiding the bulky "brick" out of sight. You can place it on top of kitchen cabinets, inside a nearby closet, or behind a piece of furniture. From there, you only need to run the thin, low-voltage DC wire to the strip's location. This gives you a clean, professional finish on your wall without any complex wiring.
5. Hardwiring Directly to Your Home's Power
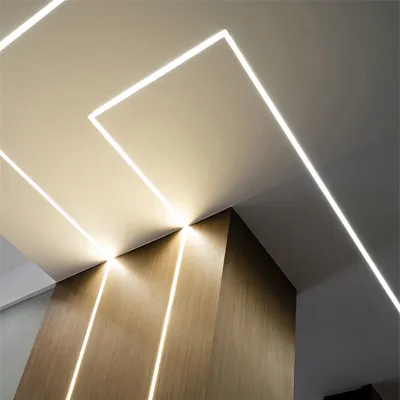
For a truly permanent and invisible installation, hardwiring is the professional's choice. This method involves connecting your LED strips to a dedicated LED driver (or transformer) that is then wired directly into your home's 120V/240V AC electrical circuit. The driver, which converts the high-voltage AC to low-voltage DC, is typically hidden in a wall, ceiling, or cabinet. This is the standard method for high-end under-cabinet lighting, integrated cove lighting, and architectural linear lighting. Due to the involvement with household wiring, this is a safe way to hardwire led strips only when performed by a qualified electrician.
6. Connecting to a Car or Boat Battery
You can easily add accent or utility lighting to a vehicle by tapping into its native 12V or 24V DC electrical system. A 12V LED strip can be connected directly to the vehicle's battery, often through the fuse box using an "add-a-circuit" fuse tap. This ensures the connection is protected and allows you to control the lights with a switch. It’s a popular method for interior mood lighting in cars, task lighting in RVs, or safety lighting on boats.
7. Going Off-Grid with Solar Power
For outdoor or remote applications where no power outlet exists, a solar-powered setup is a fantastic, sustainable option. A basic solar powered led strip system consists of a solar panel to capture energy, a charge controller to manage power, a rechargeable battery (like a 12V deep-cycle battery) to store it, and finally, your LED strip. This is perfect for sheds, gazebos, garden pathways, or any off-grid lighting need.
8. Converting Power with an Inverter
This is a more niche solution for specific situations. An inverter is a device that does the opposite of a power adapter: it converts low-voltage DC power (from a source like a car battery) into high-voltage AC power. Why would you need this? Imagine you have a large 12V battery bank but your LED strip kit came with a specific AC-powered controller or dimmer you want to use. The inverter allows you to plug your kit's original wall plug directly into it, powered by the battery.
An inverter is an electrical power converter that transforms low-voltage Direct Current (DC) into high-voltage Alternating Current (AC). In essence, it performs the opposite function of a standard power supply or adapter, which converts AC wall power into the DC power required by devices like LED strips. This becomes useful in niche situations where you have a DC power source, such as a large 12V battery, but need to operate an LED lighting kit that comes with an AC plug-in driver or a specific AC-powered controller. The inverter allows you to create a portable AC outlet, enabling you to use standard plug-in devices in off-grid or mobile applications.

Quick Comparison Table
To help you quickly compare these solutions, here is a summary table:
Method | Best For | Ease of Installation | Typical Voltage |
|---|---|---|---|
USB Port | Short desk & TV accents | Very Easy | 5V |
Power Bank | Portable events, temporary setups | Very Easy | 5V |
Battery Pack | Small DIY projects, costumes, models | Very Easy | 3V - 12V |
Hiding Adapter | Clean wall look with standard kits | Easy | 12V / 24V |
Hardwiring | Permanent, professional installations | Professional | 12V / 24V |
Car/Boat Battery | Vehicle and marine lighting | Medium | 12V / 24V |
Solar Power | Off-grid, outdoor areas (sheds, gardens) | Medium | 12V |
Inverter | Using AC kits with DC batteries | Easy | 120V / 240V (AC) |
Three Golden Rules Before You Start
Before you attempt any of these methods, keep these three non-negotiable rules in mind to ensure safety and success.
- Match the Voltage: This is the most important rule. A 12V LED strip must be powered by a 12V source. A 24V strip must have a 24V source. Mismatched voltage will either prevent the strip from lighting up or, worse, instantly and permanently destroy it.
- Provide Sufficient Power (Wattage): Your power source must be able to supply enough power for the length of your strip. As a rule of thumb, calculate the total wattage of your LED strip and choose a power supply with a rating at least 20% higher to ensure it doesn't overheat or fail.
- Check the Polarity: DC power has a positive (+) and a negative (-) side. Always ensure you are connecting the positive wire to the positive terminal and the negative wire to the negative terminal. Getting this wrong won't usually damage the strip, but it simply won't turn on.

Conclusion: Choosing Your Ideal Power Solution
As we've seen, there are numerous effective ways to power LED strips without a plug. The "best" method truly depends on your specific project. From a simple USB connection for your desk to a fully hardwired, architectural installation, the right solution is about balancing your aesthetic goals, your budget, and your technical comfort level. By understanding these options, you can now move beyond the limitations of the wall outlet and bring your creative lighting ideas to life, anywhere.
Frequently Asked Questions (Q&A)
1.How long will my LED strip run on a battery?
This entirely depends on the battery's capacity (measured in mAh) and the strip's power consumption (watts). A short, low-power strip might last for many hours on standard AA batteries, while a long, bright strip will drain them very quickly. For longer runtimes, a high-capacity USB power bank is a better battery solution.
2.If I use one of these methods, can I still cut the strip to length?
Yes, absolutely. The power source does not change the physical properties of the LED strip itself. You can still cut the strip at the designated copper cut marks, regardless of whether it's powered by a battery, USB, or a hardwired driver.
3.Does "hardwiring" mean I can connect the strip directly to my home's wiring?
No, never. This is a crucial safety point. "Hardwiring" refers to connecting a proper LED driver (the power supply) to your home's main electrical lines. The driver then converts the high voltage (120V/240V) down to the low voltage (12V/24V) that the strip needs. The LED strip itself must always be connected to the low-voltage output of the driver.